This marvel in watchmaking has been making storms amongst cognicienti around the world. The initial run of 100 pieces have been completely been taken up, and Philippe is now taking orders for the next 100, with deliveries extending to 2008.
The watch is available in either a rose gold, white gold or platinum case, and in two sizes - the traditional 34mm, and in 37mm. And in three dial options - silver or grey guilloche dial with applied dagger markers, dauphine hands, and in a printed white dial with roman numerals and blued steel Breguet hands.
This is quite simply, pun intended, the best finished watch in current production.
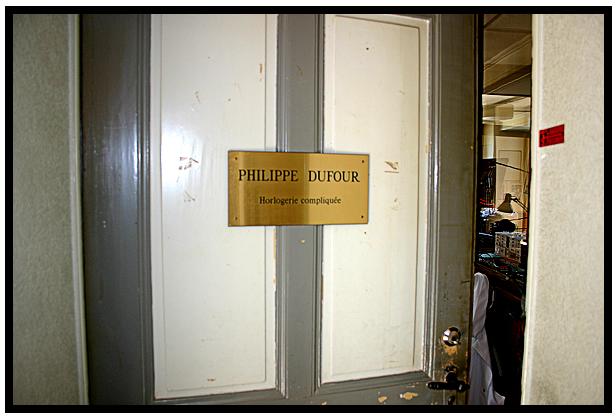
In this article, I explore with Philippe and showing pictures of the Dufour Simplicity - being constructed in his atelier, unplugged...before finishing.
Copyright 2005 Peter Chong
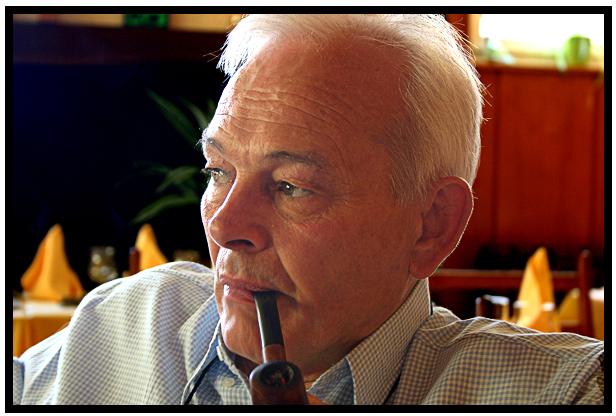
Much has been written about Philippe Dufour, his mastery of the craft of watchmaking, his insistence on perfection, his stubborn-ness to remain close to the art of his forebears, his open-ness to sharing with collectors and other watchmakers alike.
I have been close to the man for many years, since the mid-1990s, when he made his mark as the creator of the wristwatch Grande Sonnerie, and of the Duality. I visited him again at his booth in the ACHI stand in Basel 1998 when gingerly, he told me that he had created something different from his earlier creations. Something so simple, in watchmaking terms, he called it the Simplicity.
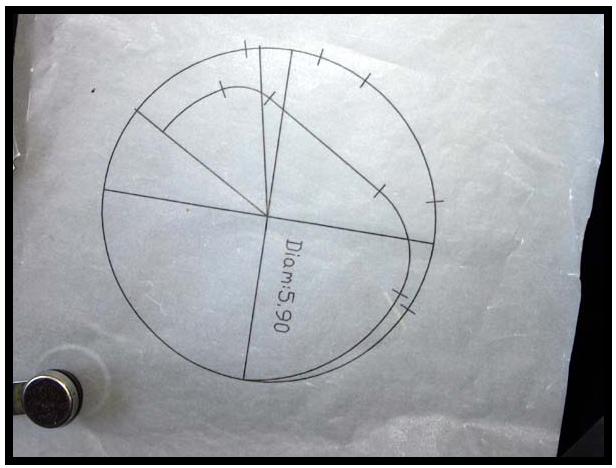
The Overcoil - how the coil is wound
The Breguet overcoil is bent to shape by hand. First, the flat coil as purchased from an old source is put on the scope and the magnified image thrown onto the screen where it is matched with a tracing of a theoretical overcoil is overlaid. The calculated curve is shown below.
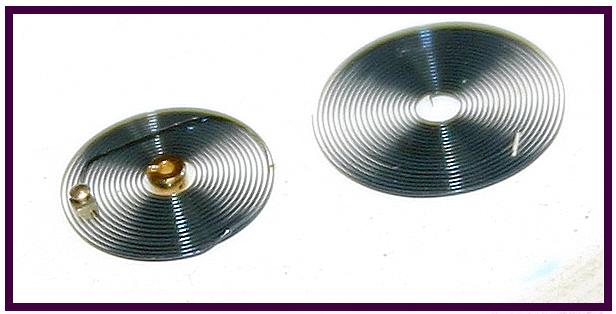
The hairspring is from a new old stock. Picture below shows the size of the hairspring.
The hairspring is then bent to shape manually, using two pairs of tweezers, and coaxed, tweaked to follow the theoretical shape. This is a laborious process and needs the eye hand coordination that not many watchmakers today possess.
The wheel train
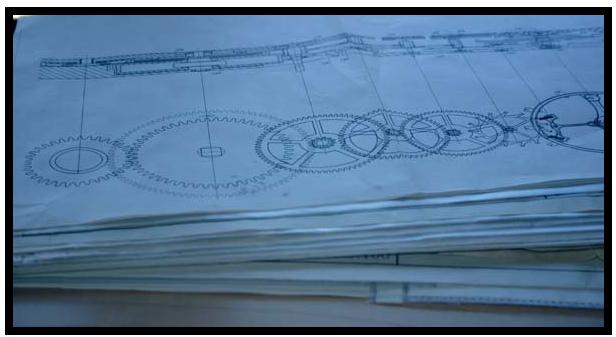
Each part is finished to the highest possible degree. The photograph below shows the linear drawing showing the engagement of the wheels, and the shape of the teeth. Philippe taught himself AutoCAD to be able to prepare drawings like these, which are required by the CNC operators to program their machines to cut the wheels. The wheels are then hand finished with hand chamfering.
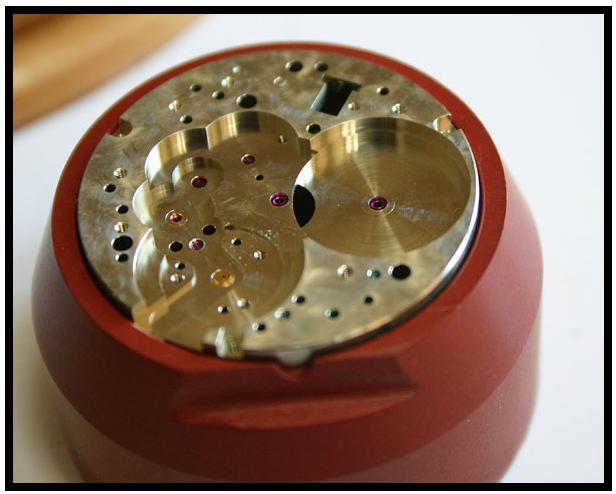
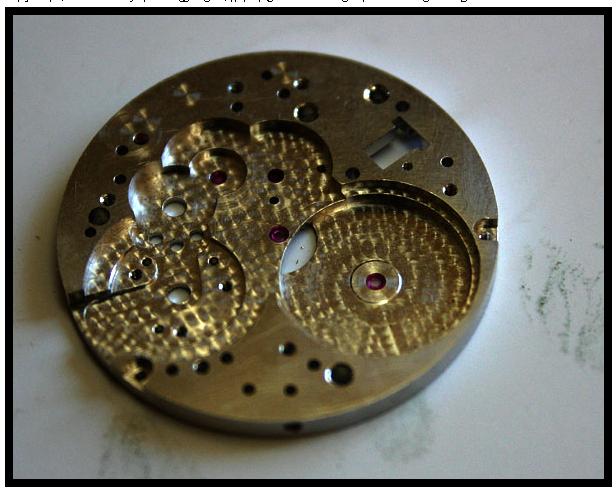
Shown below is the movement plate, yet unfinished, just returned from the CNC machinist. The edges are sharp, and require some polishing before it is ready to receive the wheel train. Philippe uses the double assembly method, to ensure that he can make the adjustments to the wheel train by assembling it, and then taking it apart before applying the final finishing to the movement. This is to ensure that he can make adjustments and ensure the wheel train works properly, and also to make sure that when the adjustments are done, he does not mar the exquisite finish characteristic of the final product.
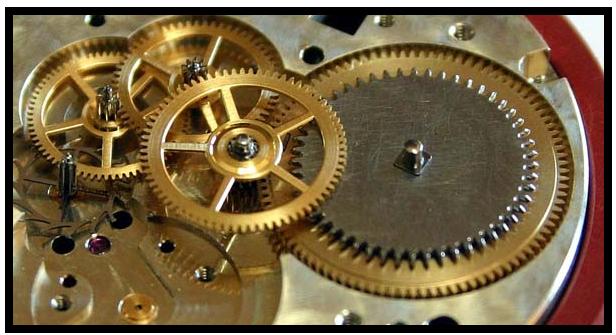
The wheels are then placed in their places with the pinions inserted into the jewels, and the wheel train is thus set, as shown below. The pinon teeth of second wheel, which turns at the rate of one revolution every hour, engages with the mainspring barrel.
Shown below, is the wheel train, showing the chamfered wheels from barrel to 5th wheel. Also shown is the black polished barrel. The wheel train below is at the stage of first assembly, before the final finishing of black polishing and Geneva stripes.
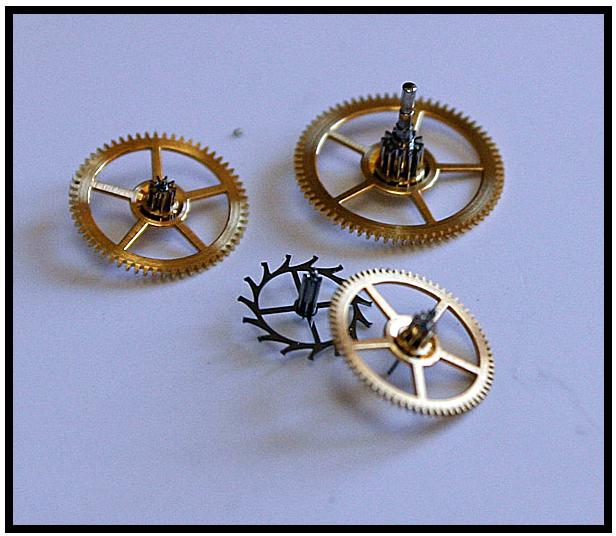
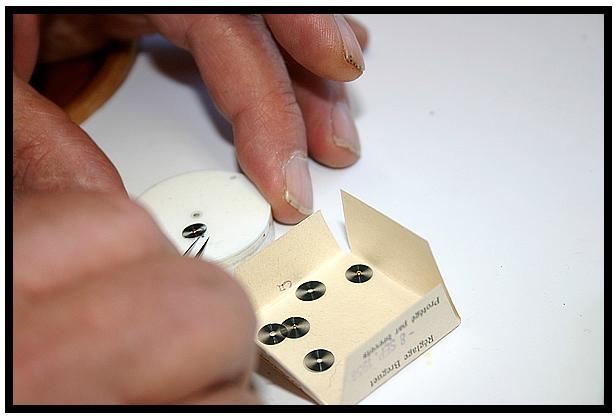
The wheels are finished by chamfering and polishing the teeth. Not many watches are thus finished. Shown below, counter clockwise from top right - the second wheel, the third wheel, the fifth wheel, and the fourth wheel.
The balance is then assembled, and the movement put into beat. The first rough adjustment is then made. When Philippe is sure the watch is ticking well, he disassembles the whole train. And begins the task of finishing the plate. Shown below is the plate with the perlage completed on the recessed areas. The faus cotes are then applied, and finally the anglage applied to the edges for the final finish.
All photographs and texts by Peter Chong