

A long-standing technique in the world of advertising photography is to shoot multiple images of the same scene, lighting each version differently to cater for different aspects of the subject. The various parts of the image are then combined to produce a final image that satisfies. With the advent of affordable and powerful digital editing software we can apply the same techniques readily on our home computers.
In this case I am dealing with a tricky brushed silver dial on a Mido watch. The dial is an important aspect of the attraction of the watch and I wished to reproduce it in a fashion that represented how it appears when viewed on the wrist. I generally diffuse my light quite heavily in order to lend a soft and even feel. This is fine for the rest of this particular image, the watch case, bracelet, and camera prop, but it causes the silvered dial to be reproduced very flat with little of the sparkle of the brushed silver finish.
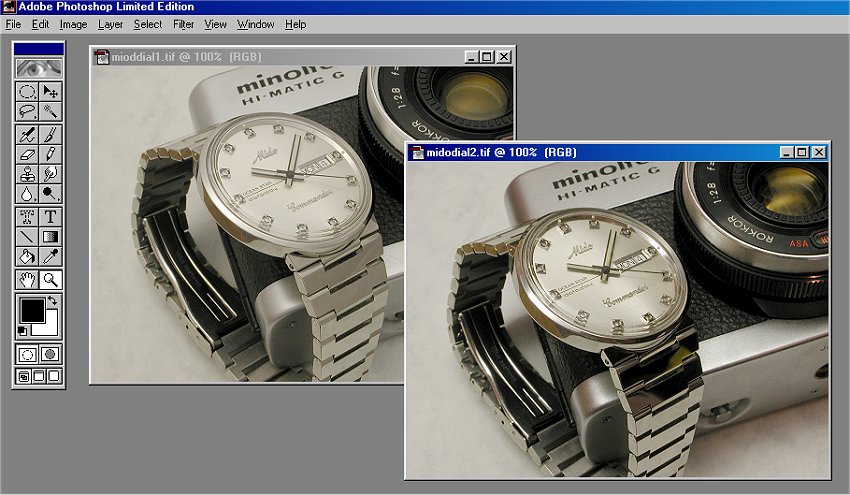
In the image below you can see the two images I shot to achieve the end result. On the left is the first image with a diffused light source. This image will provide the bulk of the final image, less the dial. On the right is the second image this time shot with the diffusion greatly reduced, allowing the dial to reproduce as I wanted. You will notice that most of the rest of the watch in particular is not very evenly lit. This does not matter as I intend to use only the dial area from this second image. It is very important that the camera is not moved, nor any lens settings changed, between exposures as we rely on the two images being able to be layered in perfect registration. Having the camera mounted on a locked-off tripod allows this to be readily achieved, (just be careful you don't accidentally kick it! :-)
To combine the images the first (diffused) image is layered over the top of the second (undiffused) image. No cropping or resizing is done at this stage so that both images overlay exactly. There are various ways to achieve the next step but in a simple example such as this I used the "Eraser" tool in Paint Shop Pro to gradually erase the dial area image from the top layer to expose the dial of the bottom layer. This was easy to achieve freehand but on more complex tasks areas can be selected with the Lasso tool. Of course you do not need to completely delete one layer as a mix of the two may achieve your ends. Something to note is that if you want to mix layers the watch hands motion (the seconds-hand particularly) must be stopped when shooting the images, otherwise you will end up with multiple hands showing. That's not a problem when you completely replace one dial image with the other as I have in this example.
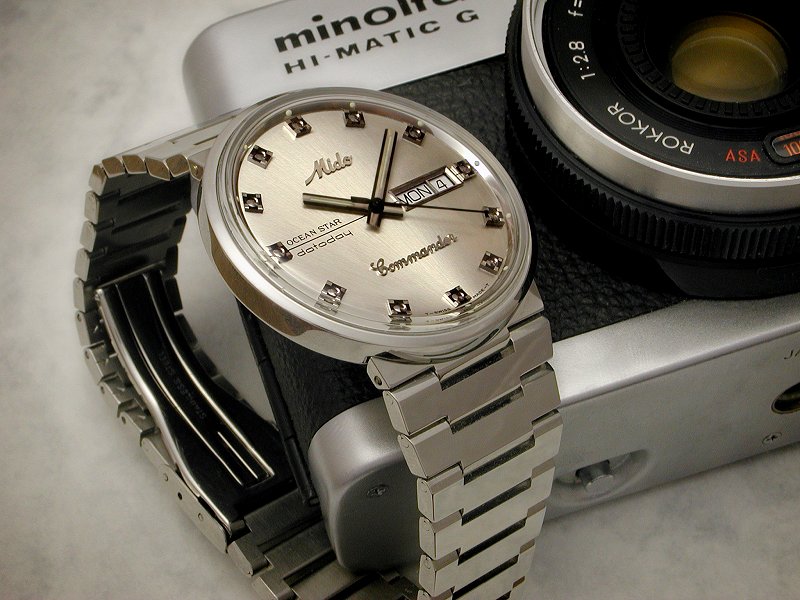
Once the desired result is achieved both layers can be merged and treated as one image from then on. Below you can see the final image which benefits from both the diffused lighting of the first image and the largely undiffused dial from the second image. This has been a simple example but the technique is not limited to dials, nor to only two exposures.
Copyright 2006-2008 Paul Delury