

I enjoy the futuristic look of many of Hamilton's "eccentric" designs of the late 50's to 60's, and had an idea to set this Flight II reproduction flying in a suitably "space age" setting. With the use of photo-editing software this wasn't too difficult to achieve. Below, I take you through the main stages of creating such an image. I use Paint Shop Pro, and Photoshop, for image editing.
Stage 1
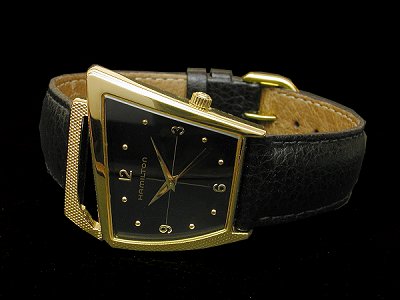
The watch is photographed against a black background. The picture was taken using a Nikon CoolPix 880 3.3meg digital camera using standard overhead diffused lighting. The lower section of the watch and strap was intentionally made to fall into shadow in order to suit the eventual environment. The image was resized to a pre-planned size to fit the final image.
Stage 2
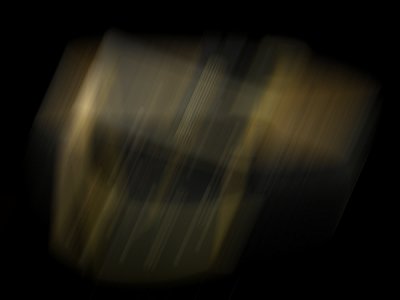
Using the Motion Blur filter in Paint Shop Pro, I smudged the image of the watch out as shown below. This would next be added to the original watch image.
Stage 3
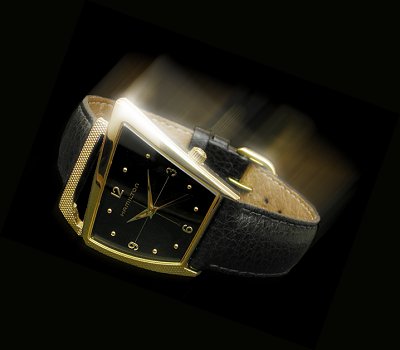
The original watch image is layered over the blurred image. The plan is to give the impression of movement, as the watch will eventually be flying through space. The resulting image is then rotated to an angle that is planned to fit the final image. Next, all of the watch image, except the dial, is selected and the Diffuse Glow filter in Photoshop is applied to make the highlighted areas glow.
Stage 4
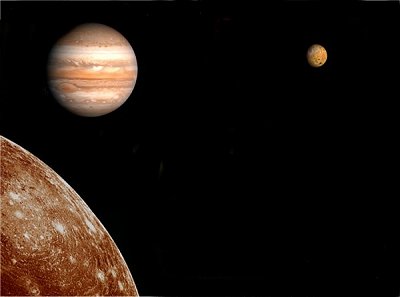
Here the background is being prepared. The use of black for space allows easy addition of the various parts of the image. You will notice that none of the images overlap in this montage. The planet images have been pasted into their respective positions, allowing space for the watch image to fit in. Note that the planets have been oriented so that their lighting is consistent with that striking the watch.
Stage 5
The watch image is pasted into the image. The shadow detail across the whole picture is decreased at this stage to ensure that all of the images, which have slightly different levels of "black" in their backgrounds, merge into a seamless image.
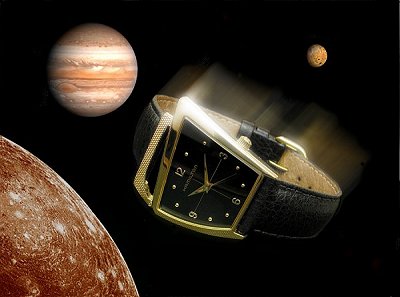
Final Stage
Stars are painted in using the Paintbrush tool set to both 1 and 2 pixel widths to give a variety of size. Different colours are also used. The larger stars are applied using the Lens Flare rendering filter in Photoshop, with the intensity kept low. Finally, the nebulous patches are applied using the Airbrush tool, with the density and opacity options set low.
Here is the final image.

Copyright 2005 Paul Delury